Using the bizExaminer Moodle Plugin
This article describes how you can use the bizExaminer plugin for Moodle to connect bizExaminer with your e-learning solution.
With our Moodle plugin, you can use all the LMS features of Moodle and let bizExaminer handle the exams. This allows you to configure exams directly in Moodle and connect them with courses and other contents, but also using bizExaminers advanced question types and security functions like proctoring and secure client.
Prerequisites
- Moodle installation (requires version 4.2.1),
- bizExaminer Account and associated API credentials
This tutorial assumes you have a working Moodle installation.
It also assumes that you have a bizExaminer account. You can request an account through this form.
Download & Changelog
Our plugin is available in the Moodle plugin directory: https://moodle.org/plugins/mod_bizexaminer
Installing the plugin in your Moodle instance
In your Moodle instance, you have to find and install the bizExaminer plugin.
- Login into Moodle as administrator
- Go to Site administration > Plugins.
- Get the current plugin version as zip from here
Note: The plugin will soon be available in the Moodle plugin directory. Until then, you can download the latest release from our GitHub repository.
- Upload the zip file and install the plugin.
- During the installation, Moodle will ask you for your API credentials.
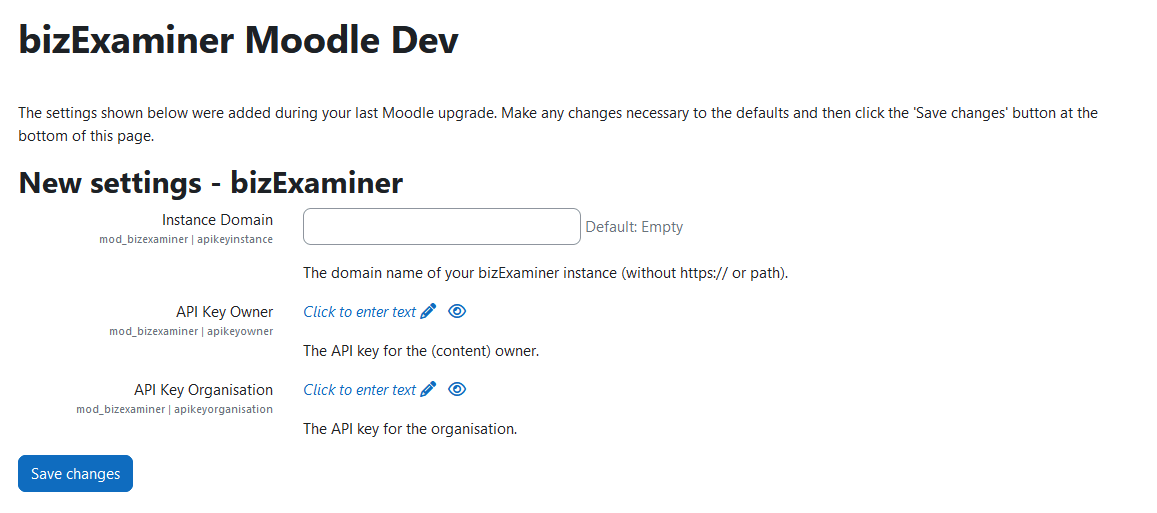
Configure your API credentials during installation.
- Enter the Instance Domain for your bizExaminer instance, i.e. yourcompany.bizexaminer.com, without the www/http.
- Enter your bizExaminer API credentials by copy/pasting them into the API Key Owner and API Key Organization fields. If you don’t have them, reach out to bizExmainer support here.
- Click Save to store the configuration.
You can always configure your API credentials later by going to Site administration > Plugins > bizExaminer > Settings. There, you can also test your credentials by clicking Test credentials. The page will reload, and you will get a success or error message.

Adding API-credentials: Add the bizExaminer instance domain and the keys.

You can test your credentials by clicking “Test credentials”. The page will reload, and you will get a success or error message.
Creating an exam and connecting it with a bizExaminer exam
After you have configured the bizExaminer plugin, you can continue to create your first exam and connect it with a bizExaminer exam.
This step requires creating an exam module in bizExaminer. If you haven’t created one, see this support article for how to create your first exam
- Log in to Moodle as teacher.
- Go to the course in which you want to create the exam.
- Enter edit mode to add a new activity to the course.
- Select “bizExaminer Exam” from the activity chooser.

Add the "bizExaminer Exam" activity to your course.
- Enter the name and description you want students to see in the course.
- From the Exam Module list, choose an existing exam module from bizExaminer.
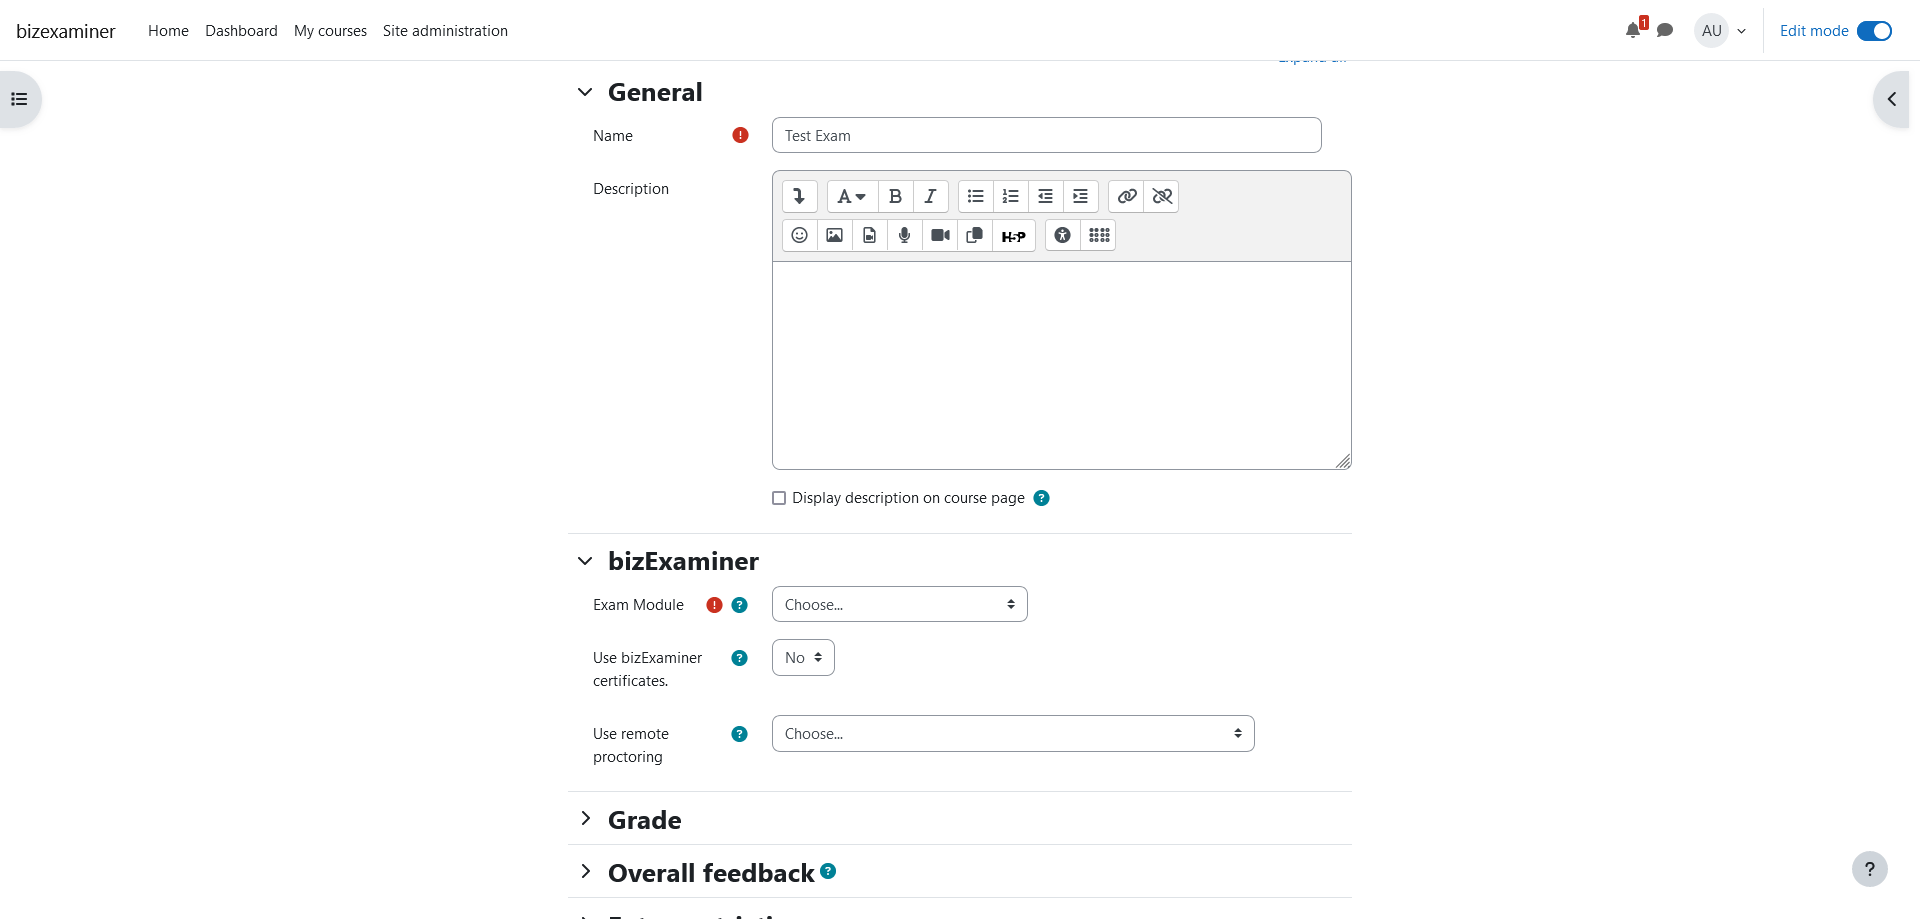
From the Exam Module list, choose an existing exam module from bizExaminer.
- Choose a remote proctoring integration. Depending on the selection, additional configuration might become visible.
To use bizExaminers advanced proctoring capabilities, a live remote proctoring integration has to be configured in bizExaminer. Available integrations are automatically displayed in the Use remote proctoring pull down field.
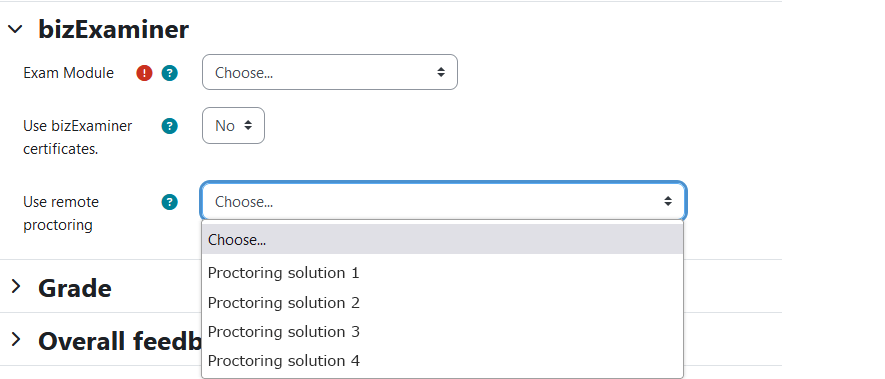
Available remote proctor integrations are automatically displayed in the "Use remove proctoring" pull down field.

Depending on the selected remote proctoring integration, additional configuration might become visible.
- Continue to complete the configuration of the exam (see below for advanced configuration). All fields provide you with help texts by clicking on the question mark symbol.
- Save the exam.
Advanced Configuration
Our plugin aims to provide similar configuration options for the exam activity as for the core quiz activity. Most of the options are named the same as in the core quiz activity, to make it easier for you to find them.
Grading
Our activity module supports Moodles Gradebook API.
Note: At the moment, our plugin only supports the grading types “None” and “Points”. We are working on adding support for scale grading as well.
Access Restrictions
- Date and time planning
- Limit by password and IP address
- Maximum re-attempts, time delay between attempts
Other Settings
- Feedback messages
You can define feedback messages shown to the student after completing the exam. The messages can differ based on the achieved score. This is similar to Moodles core quiz module. - Automatic activity completion
- Competencies
Note: At the moment competencies are added for the complete exam, not for sections of it.
How students experience Moodle exams connected to bizExaminer
When a student starts the quiz, they are automatically redirected to the bizExaminer exam. After they have finished the exam, they will get back to the Moodle exam.
- Students sees the exam in the Moodle course, and – if the exam is opened and the students pass all access restrictions – they can click Start exam.

Students can take the exam.
- The exam opens through bizExaminer in-page.
Note: If you have enabled remote proctoring for this quiz, the student is redirected to the remote proctoring page. - The student takes the exam.
- If the student should close the tab/window, they can resume the exam from the Moodle exam page again, if this is enabled in the exam settings.
- After the student finishes the exam, they are redirected to the Moodle exam results page and all results are displayed.

Students can view all their previous attempts, their results and grade.
How teachers experience Moodle exams connected to bizExaminer
Teachers can see all attempts that students have taken on an exam. They can also see detailed results for an attempt (just like students) and optionally delete an attempt.

See a list of all attempts for an exam.