Using the bizExaminer WordPress Plugin
Important notice: This article is about using our standalone WordPress plugin. If you are using LearnDash, checkout the documentation for our LearnDash extension here: Using the bizExaminer LearnDash Extension
This article describes how you can use the bizExaminer WordPress plugin to connect bizExaminer with your website.
With our WordPress plugin you can bring bizExaminer directly into WordPress.
Prerequisites
- WordPress installation
- bizExaminer WordPress plugin
- bizExaminer Account and associated API credentials
This tutorial assumes you have a working WordPress installation.
It also assumes that you have a bizExaminer account. You can request an account through this form.
Installing the plugin in your WordPress instance
In your WordPress instance, you have to find and install the bizExaminer plugin
- Login as WordPress WP-Admin.
- Go to Plugins > Add New.
- In the Search bar, search for ‘bizExaminer’.
- Click on Activate to start the activation of the plugin.
Alternatively, you can also download the plugin from the WordPress plugin repository and upload the zip.
Important: We provide two plugins – a standalone plugin (“bizExaminer”) and a LearnDash extension (“bizExaminer LearnDash Extension”). Make sure to install the standalone plugin.
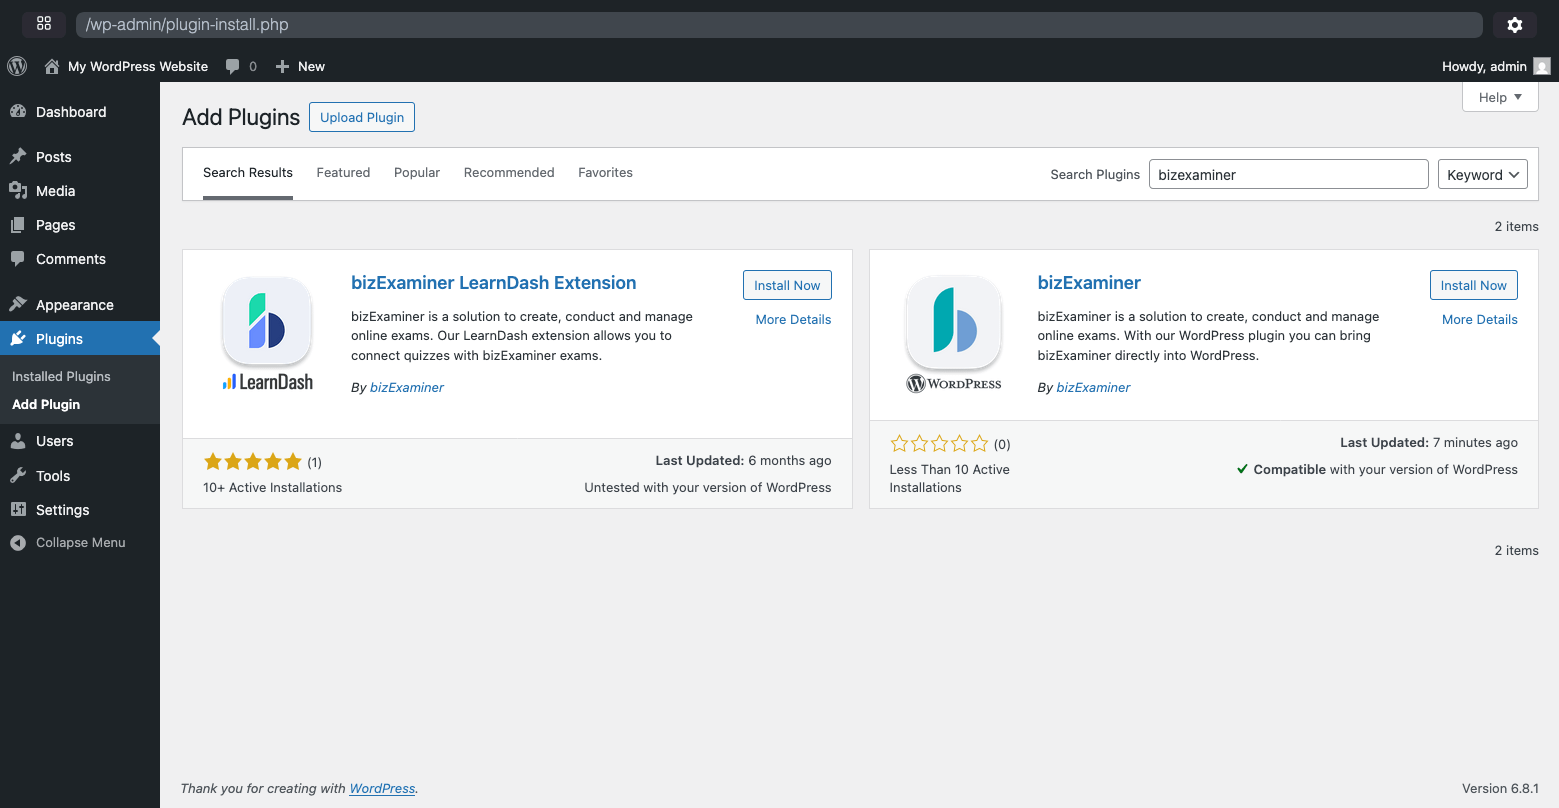
Search for "bizExaminer" in the WordPress.org plugin repository and click "activate".
- After the installation is complete, and the plugin is activated, click on Settings and select bizExaminer.
- Add a Name for the API key entry; Note: this name will show up in the backend when you configure which API credentials to use.
- Enter the Instance Domain for your bizExaminer instance, i.e. yourcompany.bizexaminer.com, without the www/http.
- Enter your bizExaminer API credentials by copy/pasting them into the API Key Owner and API Key Organization fields. If you don’t have them, reach out to bizExmainer support here.
- Click Add API-Credentials to confirm.
- Click Save to store the configuration.
- Optionally: You can test your credentials by clicking “Test” for a credential-set. The page will reload, and you will get a success or error message.
You can add multiple API credentials to work with different content owners or even on different bizExaminer instances.
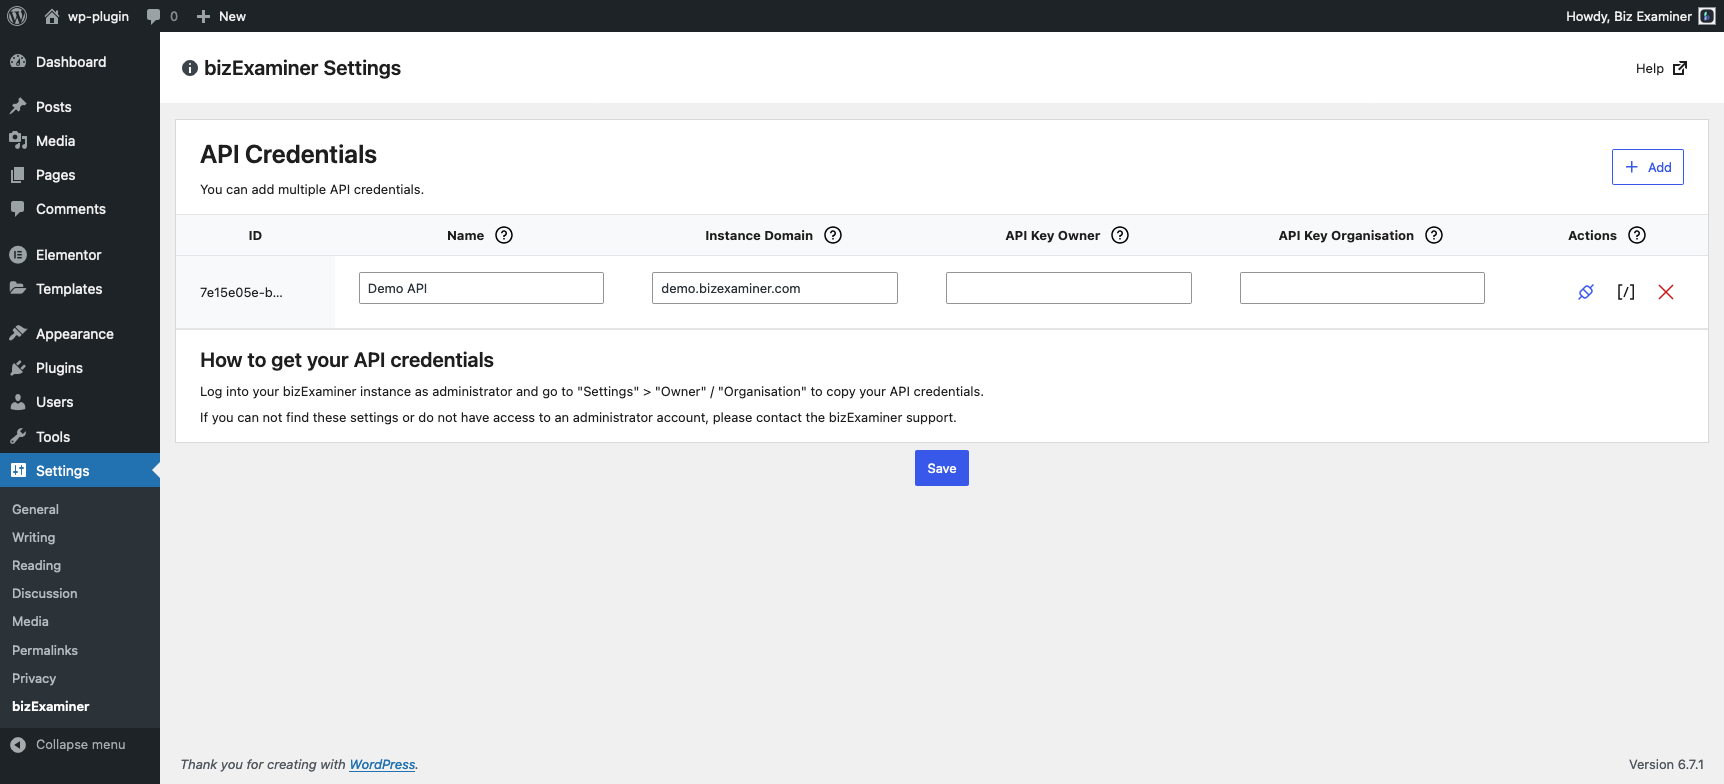
Adding API-credentials: Add a name, the bizExaminer instance domain and the keys.
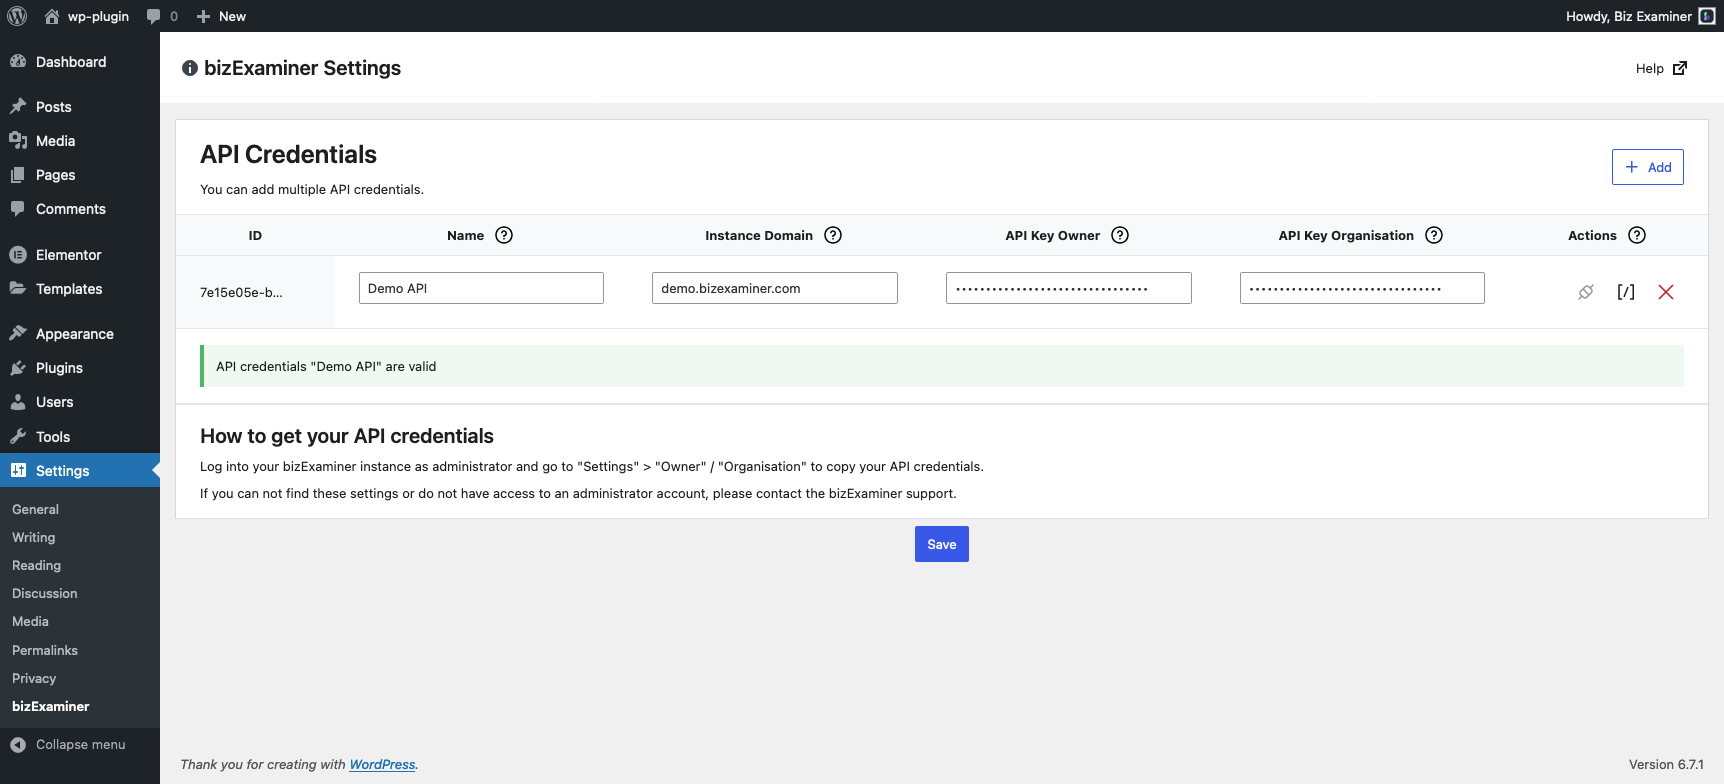
You can test your credentials by clicking “Test” for a credential-set. You will get a success or error message.
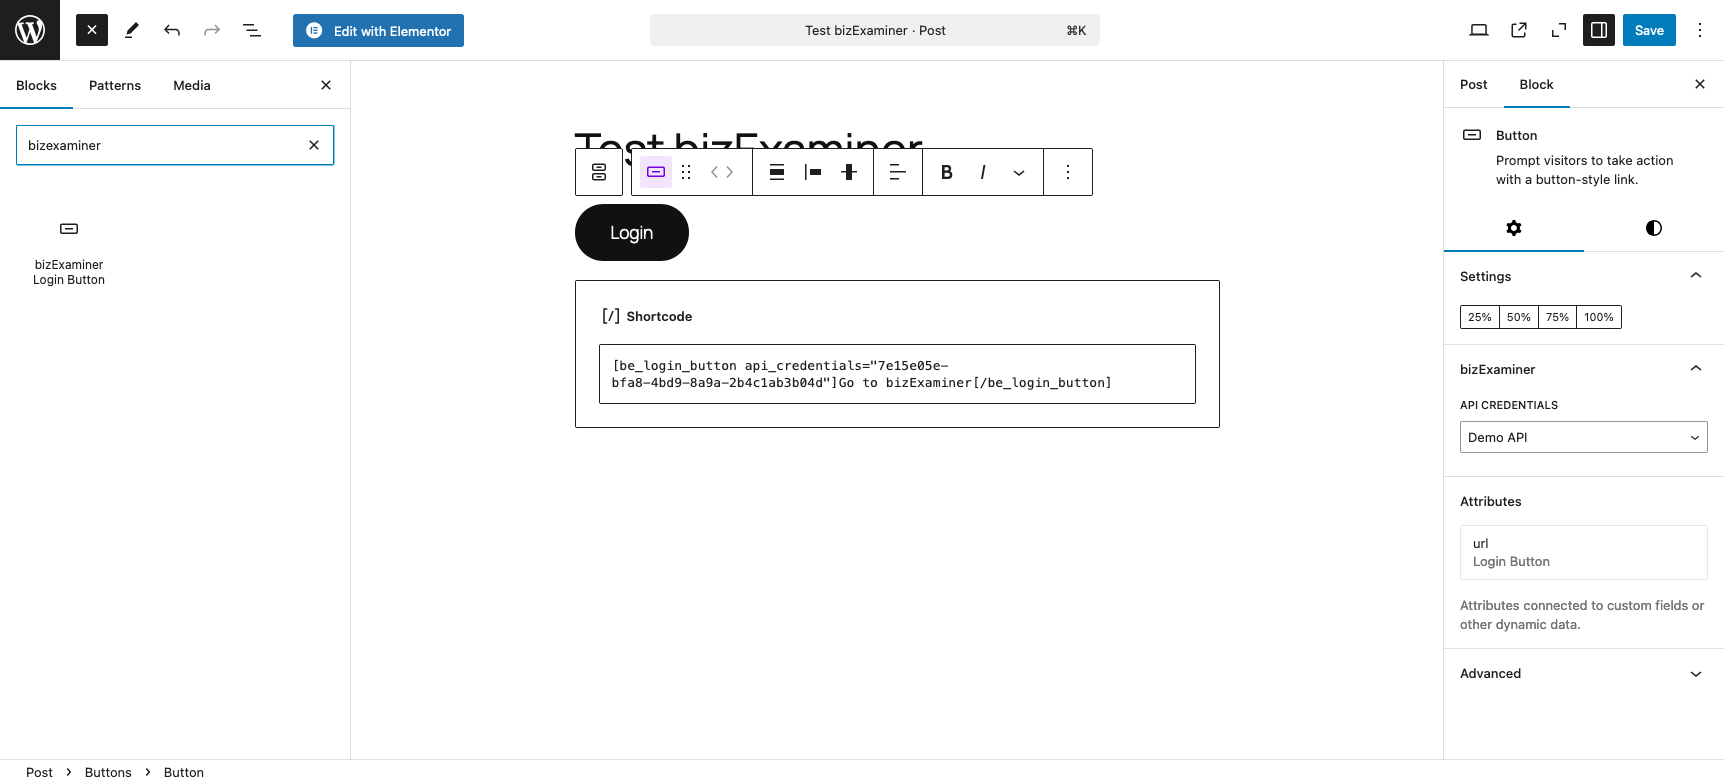
Insert a "Buttons" block and inside it the "bizExaminer Login Button" block variation and choose the API credentials to use
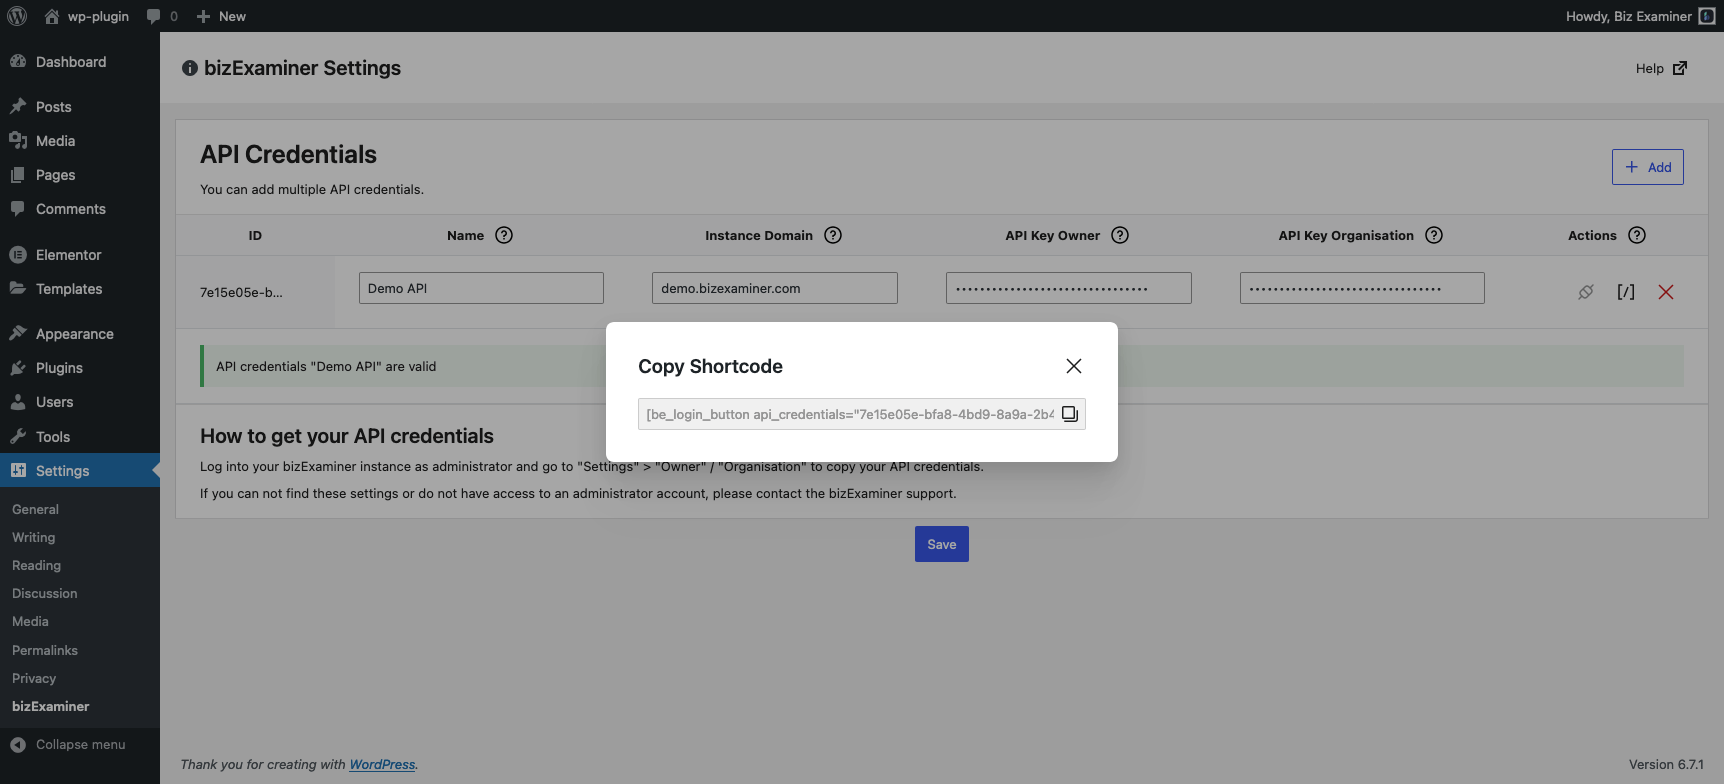
Click the "generate shortcode" icon to automatically generate a login button shortcode for the API credentials